
How to Get a Dark Chrome Plating Finish?

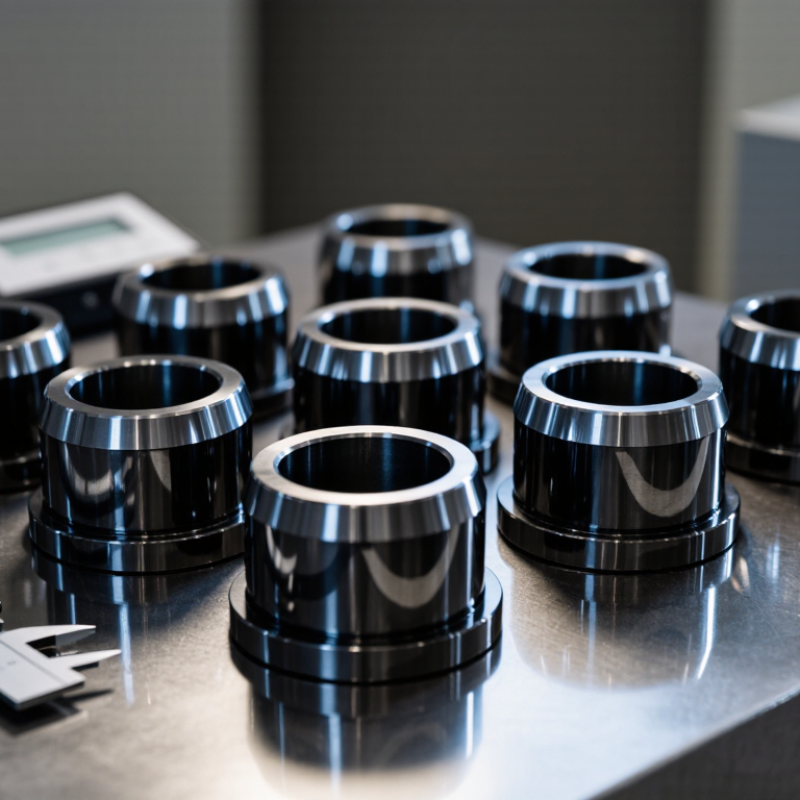
Dark chrome plating is not simply chrome with the brightness turned down. Its appearance depends on the substrate, preparation, coating system, and final surface treatment. A deep charcoal tone can look almost black under soft light, then reveal a cool metallic sheen along a sharp edge. Small process changes can shift that effect.

Plating consultant Frank Altmayer is a recognized industry voice. A concise paraphrase of a core plating principle associated with his technical work is: “Consistent results begin with controlled preparation and process conditions.” Treat this as a paraphrase, not a verbatim quotation. That distinction matters. A finish that looks dramatic in a sample photograph may appear uneven on a larger part, especially where geometry changes or the surface was poorly prepared.

This guide explains how to plan a dark chrome finish, assess compatible substrates, and discuss coating options with a qualified finishing provider. It also covers inspection, color expectations, and common causes of patchiness. Look closely at a test panel before approving production. Check it under both bright and subdued lighting. The result may not match every reference image, and that is worth acknowledging. Dark chrome plating is a controlled finishing choice, not a guaranteed color recipe. Reliable specifications, clear samples, and documented process checks help set realistic expectations.
How to Get a Dark Chrome Plating Finish?

Understanding the Dark Chrome Plating Process

Dark chrome plating begins with a clean, active surface. Oil, polishing compound, or oxide can weaken adhesion, so parts are degreased, rinsed, and prepared before entering the plating bath. Many systems use a nickel layer beneath the chromium deposit. It helps create an even base and can improve corrosion resistance.

The dark tone comes from the plating chemistry and controlled operating conditions, not simply from adding black paint. Bath composition, electrical current, temperature, and plating time can all affect the final shade. The result may range from smoky gray to nearly black. Color can shift. Experienced finishers test a sample before processing a full batch, then inspect coverage under consistent lighting. A coating that looks uniform in the tank may show streaks around edges or recessed areas after drying. That detail is easy to miss.

After plating, parts are rinsed and dried, then checked for appearance, adhesion, and coating thickness. Measurements on sample pieces help confirm consistency between runs. A protective sealer may be used when the application needs extra resistance to handling or moisture. It can also change the gloss, so the finish should be evaluated with the sealer in place. The process takes control, and occasional variation still deserves investigation.

Preparing and Cleaning the Substrate

Preparing the substrate is where a dark chrome finish earns its consistency. Oil from handling, polishing compound, and fine abrasive dust can disrupt adhesion or leave pale patches. ASTM B322-99(2020), the industry guide for cleaning metals before electroplating, describes cleaning as a process matched to the metal and its contamination—not a single universal wash. Start with a compatible degreaser, rinse thoroughly, and inspect seams and recessed edges, where residue often hides. A clean-looking surface is not proof.

Use a water-break test: a continuous sheet of water suggests the surface is free of many oily contaminants; beading signals more cleaning is needed. It is a useful check, not a complete one. For soluble salts, ISO 8502-9 provides a field method that reports contamination as milligrams per square metre. Its results help compare parts and document process control, but the standard does not set one universal acceptance limit for electroplating. Keep the test area, rinse-water quality, and readings consistent. Then activate the substrate promptly before plating, following the qualified process for that metal. Timing matters. A small delay can allow flash oxidation, especially on reactive alloys, and that detail is easy to miss.

Applying the Chrome Plating Layers

A dark chrome finish begins well before the final layer reaches the part. The substrate must be clean, smooth, and free of polishing compound. Even a faint water break can signal residue. Small errors show. Edges, recesses, and drilled holes need careful attention because plating may build unevenly across them.

A typical system uses prepared metal, followed by one or more underlayers, then a dark chromium deposit. Copper can help level surface marks, while nickel often supports corrosion resistance and a uniform base. The exact stack depends on the substrate, part shape, and performance requirements. A mirror-bright underlayer may reveal flaws rather than hide them. That detail is easy to underestimate. Before plating, technicians should confirm surface activation and check that parts make reliable electrical contact.

The dark tone comes from the final deposit and its process conditions, not simply from adding a black layer. Bath chemistry, temperature, current distribution, and plating time can all affect shade and coverage. Recesses may look lighter or less consistent than exposed faces. Test coupons help compare color and thickness before treating valuable parts. Inspect the finish under more than one light source, and check edges for thin spots, pits, or peeling. A small mismatch can be noticeable beside another component.

Creating the Dark Finish Through Controlled Treatment

Dark chrome is not simply ordinary chrome with less shine. Its appearance comes from a controlled change in the deposited layer and, in some systems, a carefully managed post-treatment. The exact route depends on the coating stack and the part’s intended use.

Preparation sets the limit. The part must be clean, smooth, and evenly activated; fingerprints or polishing residue can create pale patches. During plating, trained operators track bath condition, temperature, current, and dwell time against a validated process window. Small changes matter. A test coupon beside the component can reveal shifts in tone before a batch is accepted. Darker is not automatically better: excessive treatment may reduce uniformity or affect corrosion performance.

Check color under consistent lighting, then review gloss, coverage, adhesion, and required durability. A sample can look neutral beneath a white inspection lamp but blue beside warm interior lighting. That is a real limitation of visual judgment, so measurements and reference panels improve repeatability. Keep records of settings and inspection results; they make adjustments evidence-based rather than guesswork. Not a shortcut. If the finish varies across edges or recesses, review the approved treatment with a qualified plating specialist instead of masking defects with extra coating.

Inspecting and Protecting the Finished Surface

Inspect a dark chrome finish only after the part has cooled and is completely dry. Use diffuse light first, then move a handheld light across the surface at a shallow angle. This reveals uneven tone, fine scratches, pinholes, and dull patches that direct lighting can hide. Check edges, recesses, and corners closely; coating can look consistent on broad faces but vary in tight areas. Compare similar surfaces under the same lighting. A small change in angle can make the finish appear lighter or darker.

Look for lifting, blistering, or flaking, especially around edges and holes. Do not scrape the coating to test it. If a defect appears, photograph it and ask the plating specialist to assess it against the agreed finish requirements. A visual check cannot confirm coating thickness or adhesion. Those properties need suitable inspection methods. I have found that rushed checks miss subtle streaks, so a second look after handling is worthwhile.

Tips: Wear clean gloves to avoid fingerprints. For routine care, use a soft, clean cloth with mild soapy water, then dry the surface promptly. Skip abrasive pads and aggressive cleaners; they can dull or mark the finish. Test any protective product on a hidden area first, since coatings may respond differently.

How to Get a Dark Chrome Plating Finish? - Inspecting and Protecting the Finished Surface

Inspection Area Method or Tool Acceptance Guidance Protection and Handling
Color and overall appearance Inspect under consistent, diffuse lighting; compare with the approved sample or specified color standard. Check for consistent shade and sheen across the visible surface. Assess parts under the same lighting and viewing conditions because dark finishes can look different as illumination and viewing angle change. Keep parts away from direct sunlight and strong heat sources during inspection and storage.
Coverage and visual defects Examine the full part, including edges, recesses, corners, and areas around holes. Look for bare areas, blisters, peeling, pits, cracks, stains, and handling marks. Apply the acceptance limits agreed in the drawing or purchase specification. Use clean gloves and avoid touching the finished face. Separate parts with non-abrasive, non-shedding material.
Coating thickness Use a calibrated coating-thickness instrument suitable for the substrate and coating system; verify the measurement method on an appropriate reference. Compare readings with the specified thickness for each layer or for the complete coating system, as applicable. A single reading may not represent edges or complex shapes. Do not scrape or abrade the surface to check thickness. Record measurement locations and instrument details.
Adhesion and coating integrity Use a test method agreed for the part and coating system, such as a suitable adhesion test on a representative sample. Assess against the applicable specification. Destructive tests should generally be performed on test coupons or sacrificial samples rather than finished production parts. Do not perform tape, cut, or impact tests on a customer-facing surface unless the specification explicitly requires them.
Surface cleanliness Inspect in clean light for fingerprints, polishing residue, dust, water spots, and other contamination. The surface should be clean and dry, with no residue that affects appearance or the intended use. Remove light contamination with a soft, clean cloth and a cleaner confirmed compatible with the finish. Test on an inconspicuous area first.
Corrosion resistance Review the agreed corrosion-test requirement and results for the specified coating system, where applicable. Use the test duration, method, and rating criteria stated in the relevant specification. Salt-spray performance depends on the complete coating system and is not established by appearance alone. Keep the finish dry and avoid prolonged exposure to salts, acids, alkalis, and aggressive cleaners unless compatibility is confirmed.
Packaging and storage Check that parts are dry, separated, and protected before packing. Packaging should prevent surface-to-surface contact, abrasion, and movement during transport. Use clean, soft separators and a dry storage environment. Avoid adhesive tape directly on the plated face unless approved for the finish.
Routine care after installation Clean periodically with a soft cloth, water, and a mild, finish-compatible cleaner. Follow the coating supplier's care instructions and the part specification; test any new cleaner in a hidden area. Avoid abrasive pads, scouring powders, strong solvents, and unapproved metal polishes, which may scratch or alter the dark appearance.

Note: Dark chrome appearance and performance depend on the substrate, preparation, coating layers, and process. Use the part drawing and agreed coating specification as the controlling acceptance criteria.